
This guide outlines the process of setting up a staging site for internal use, ensuring that your development and testing environments are secure and isolated from your production sites. The staging sites we will create are for the following domains:
Production Sites:
- my.test.ca
Staging Domains:
- test.kzstage.com
Step 1: Creating an Account in WHM
- Access WHM:
- Log in to the WHM server to begin creating the account for your staging site.
- Enter Domain Information:
- Input the appropriate domain name for the staging site. The username will automatically be generated based on the domain.
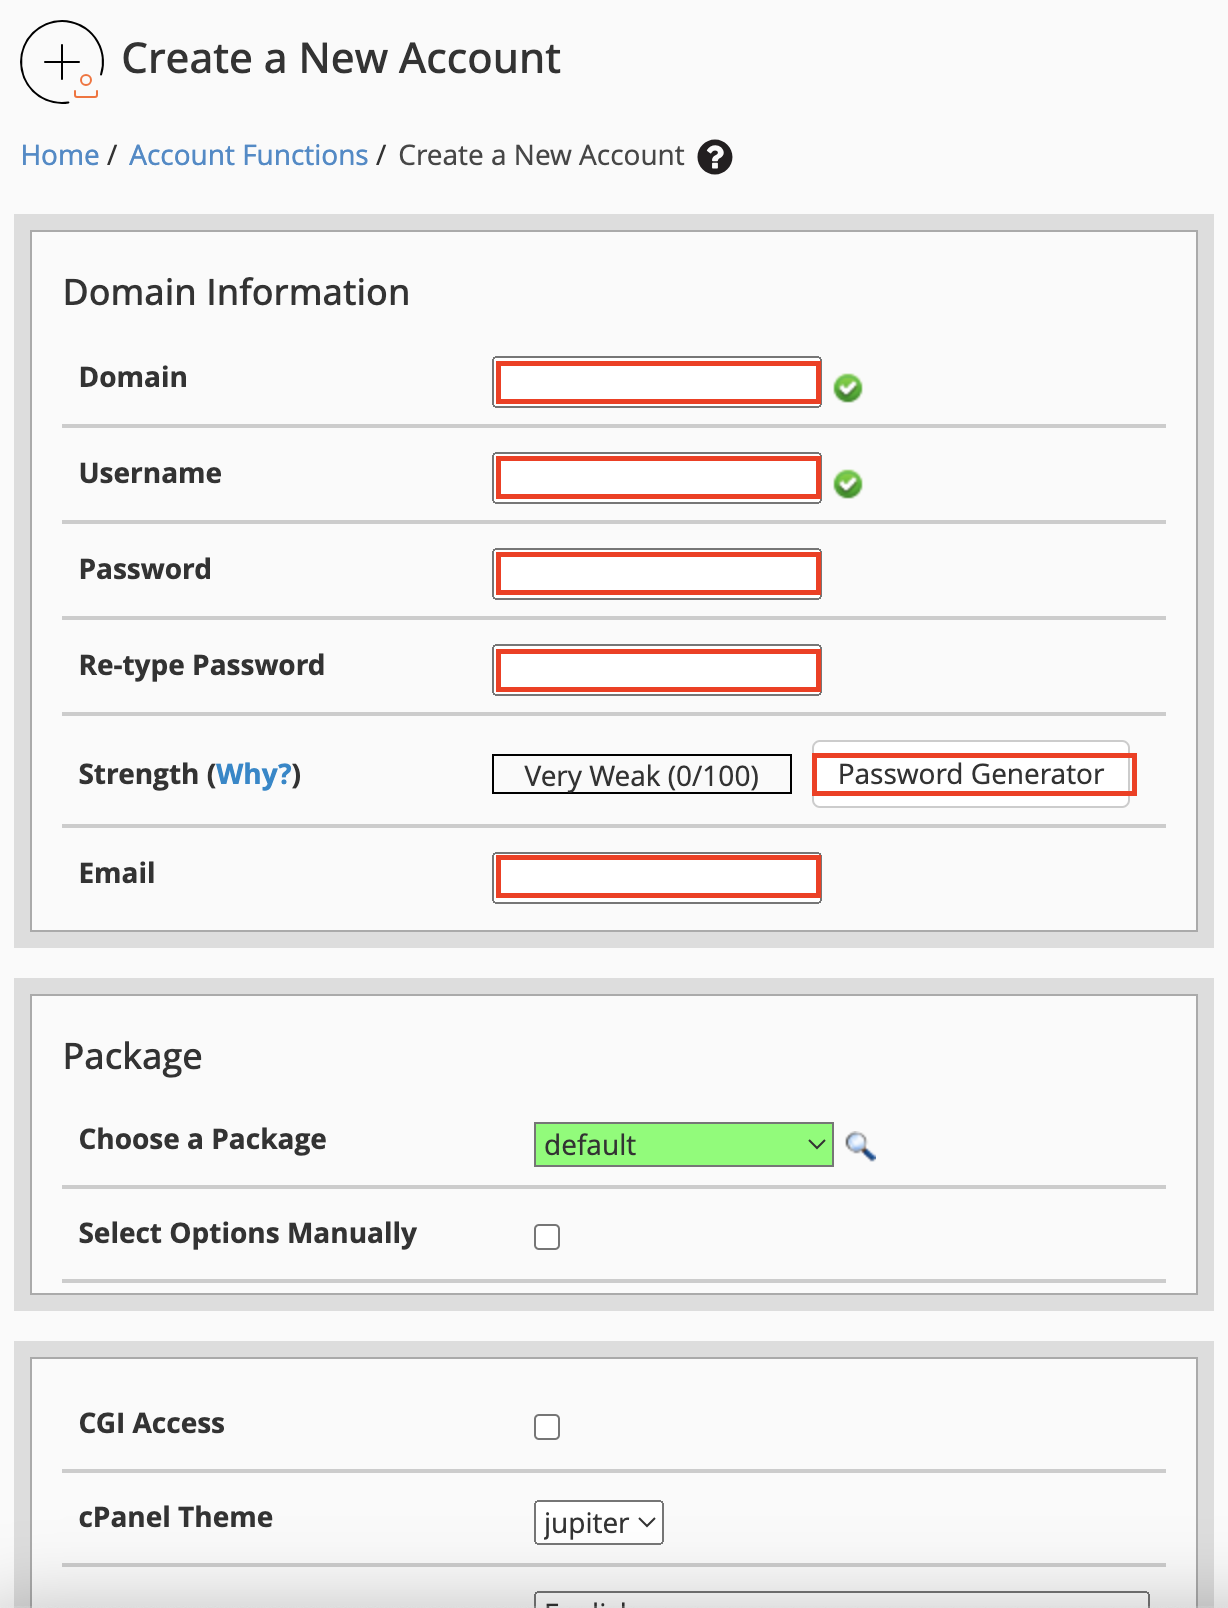
- Secure Account Credentials:
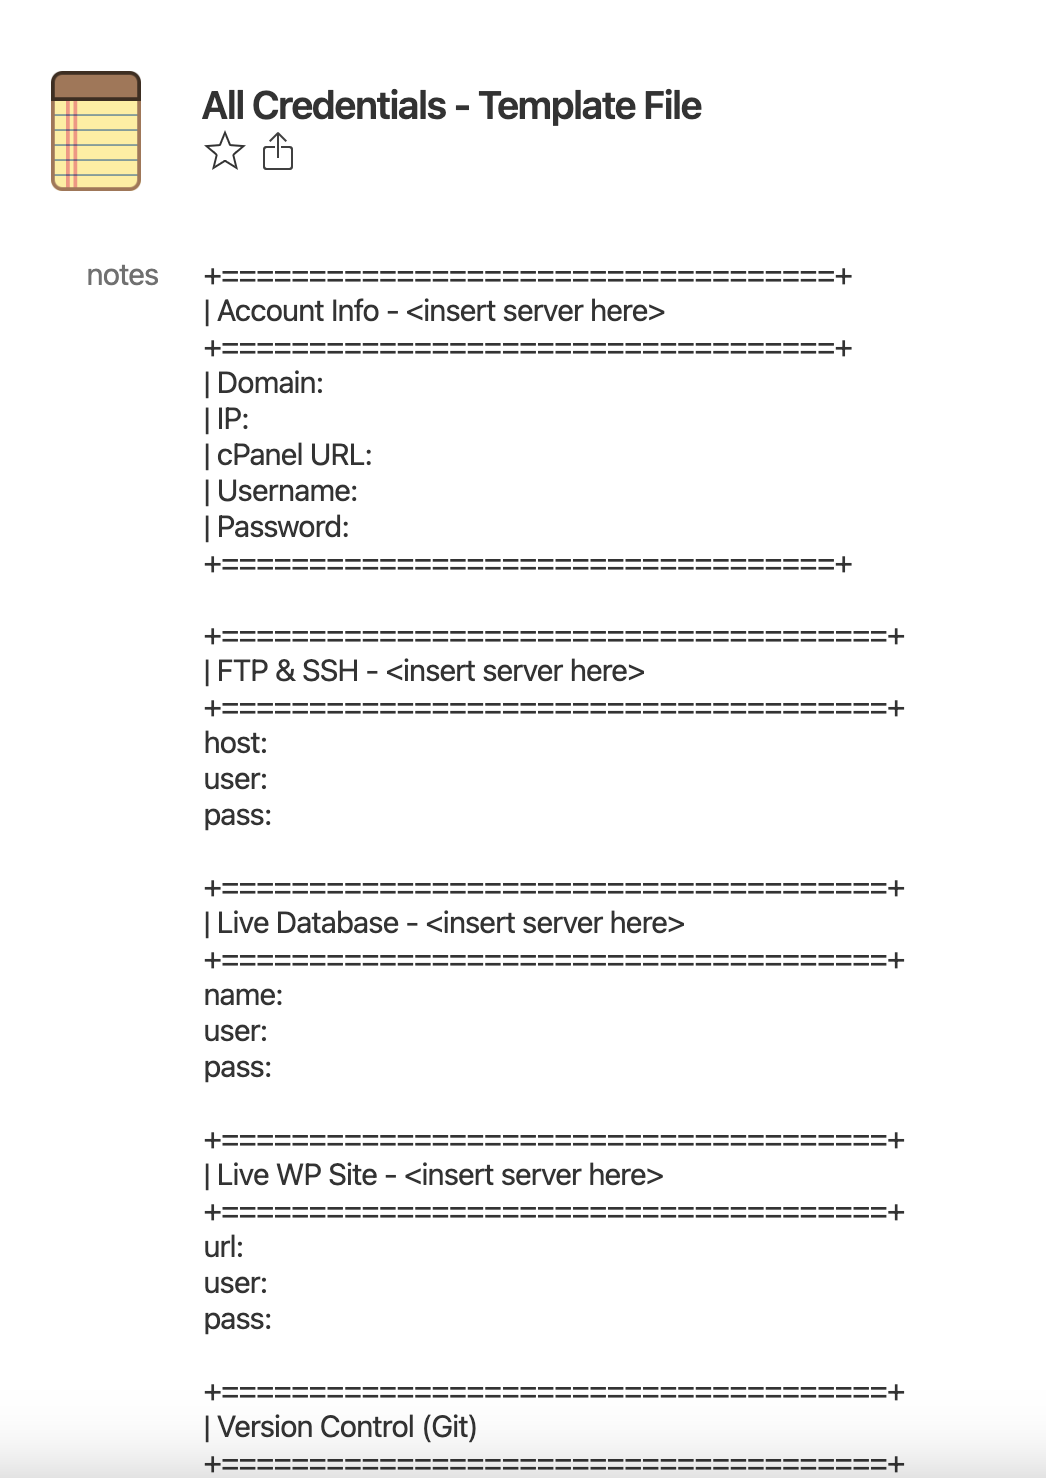
- Open 1Password and create a new “Secure Note.”
- Copy the content from the “All Credentials – Template File” located in the “Client ‘All Credential’” vault, and paste it into the newly created Secure Note.
- Click “Generate Password,” set the length to 18 characters, and copy the password into the Secure Note.
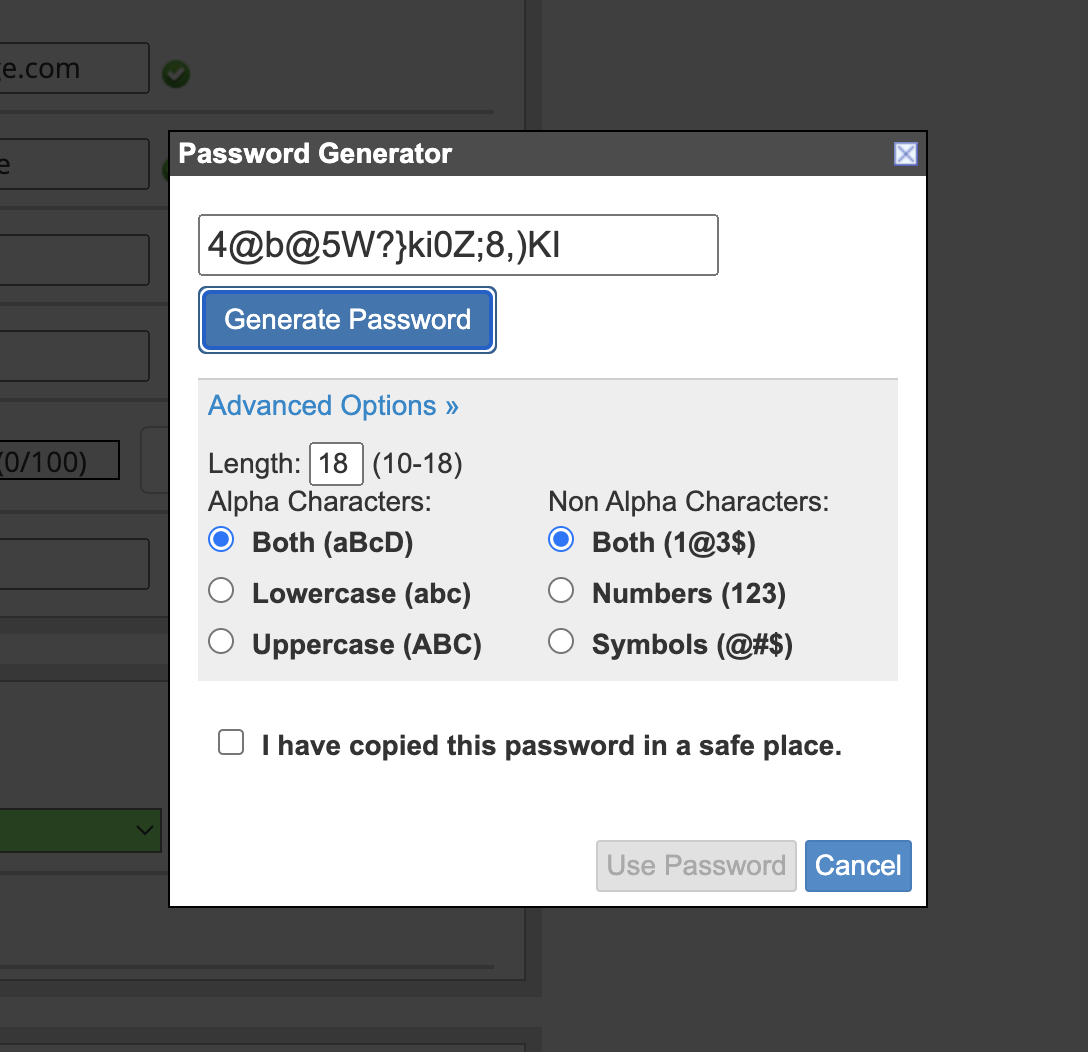
- Confirm by selecting “I saved the password in a secure place,” then click “Save.”
- Completion:
- The account creation process is now complete.
Step 2: Configuring the Database
Creating a New Database
- Access cPanel:
- Navigate to cPanel for the newly created account.
- Manage Databases:
- Go to “Manage My Databases” and under “Create New Database,” enter a name for your database. This name can be arbitrary.
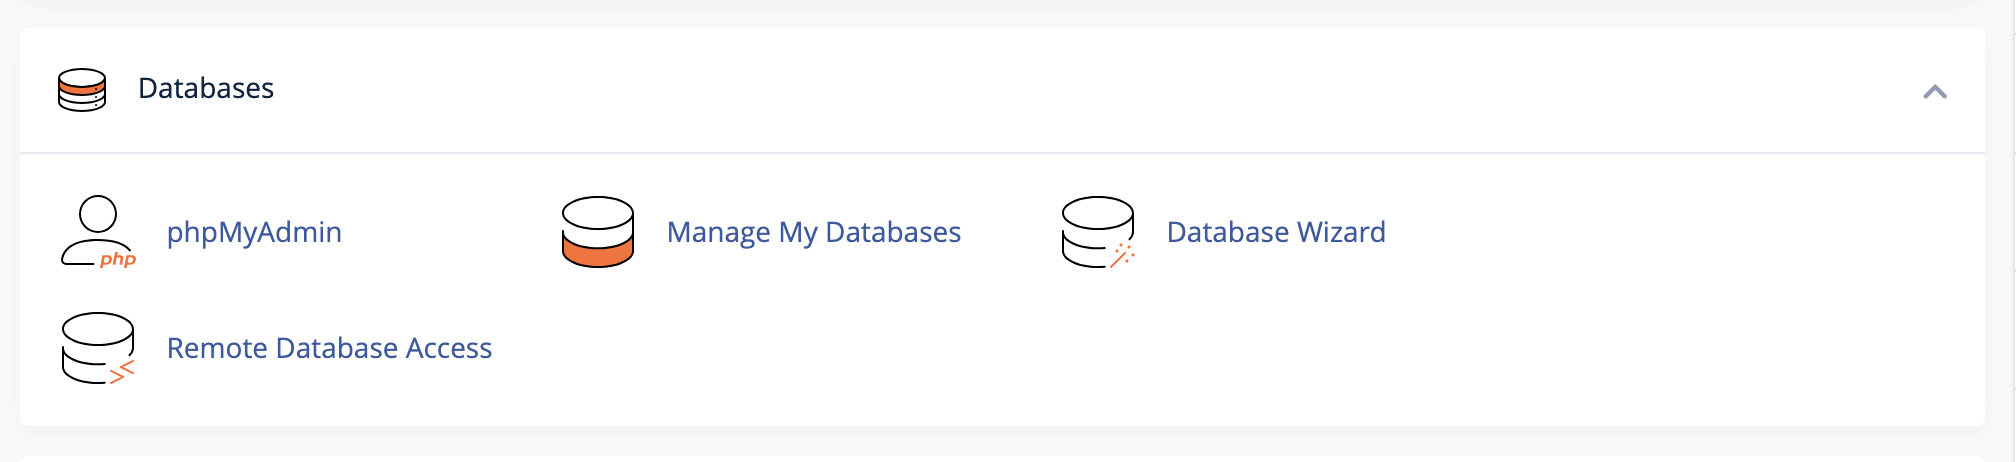
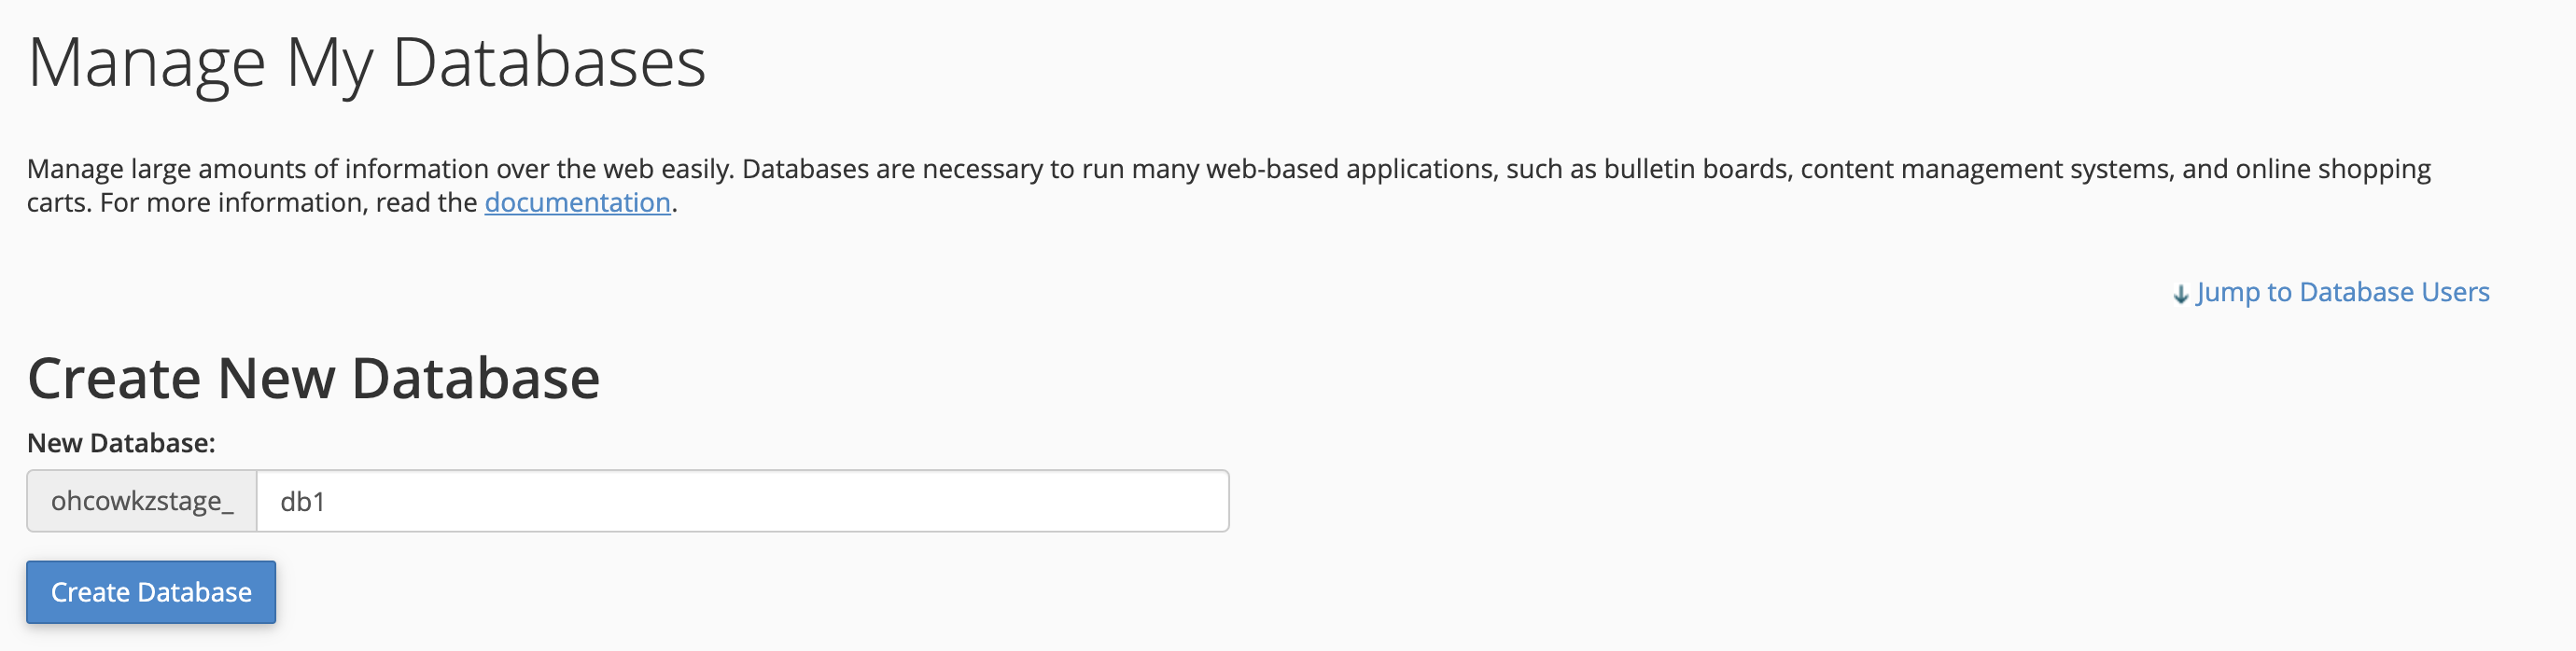

- After entering the database name, click “Create Database” and then select “Go Back.”
Adding a New Database User
- Create User:
- Under “Add New User,” input a username. The name is flexible and can be anything suitable.
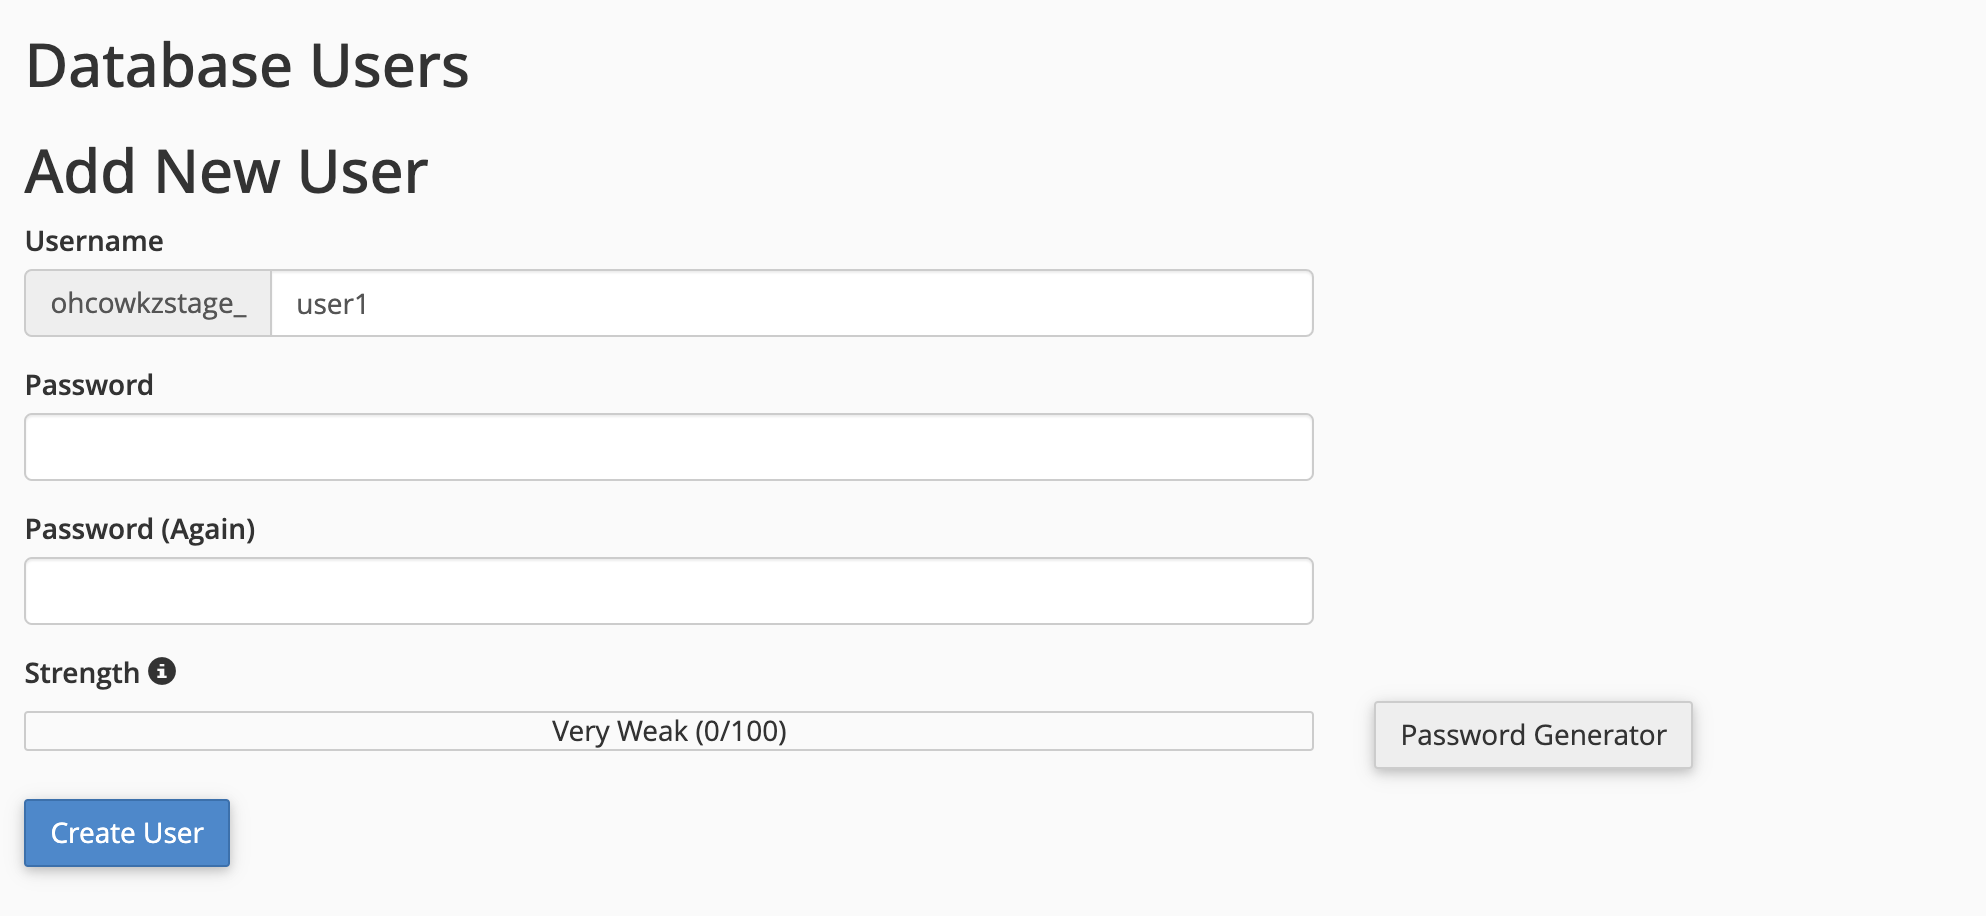
- Generate a secure password (18 characters) and save it in the Secure Note in 1Password.
- Confirm the password by checking the box and clicking “Use Password.”
- User Creation:
- Click “Create User,” then select “Go Back.”
Assigning User to Database
- Link User to Database:
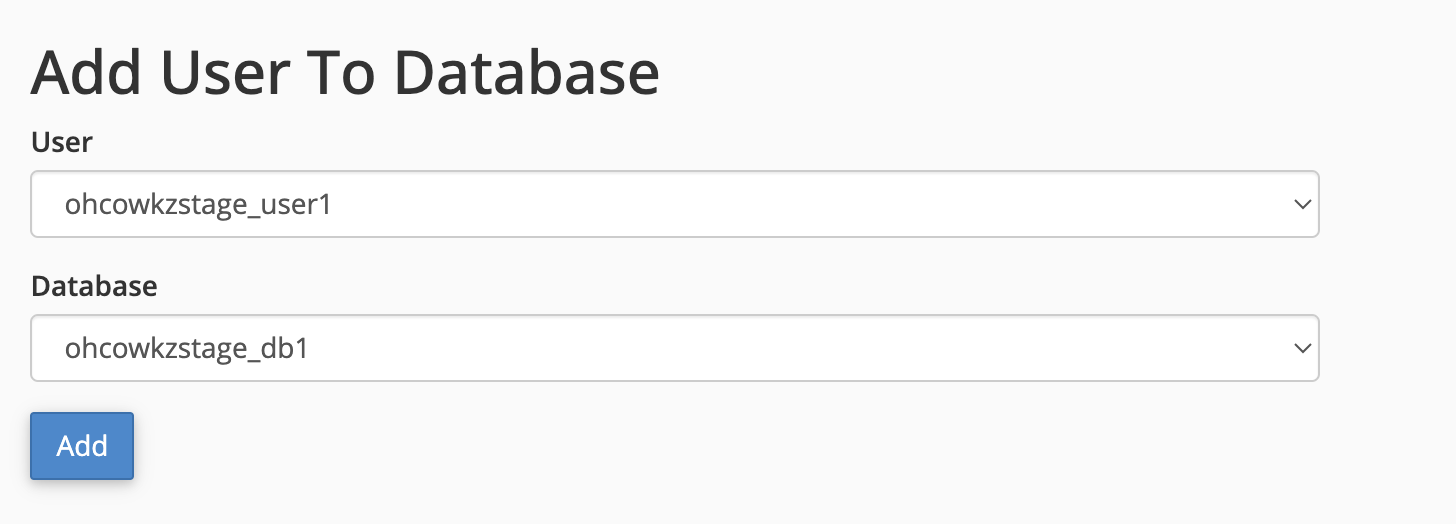
- Under “Add User To Database,” select the newly created user and database. If not automatically filled, choose the correct options from the dropdown menus.
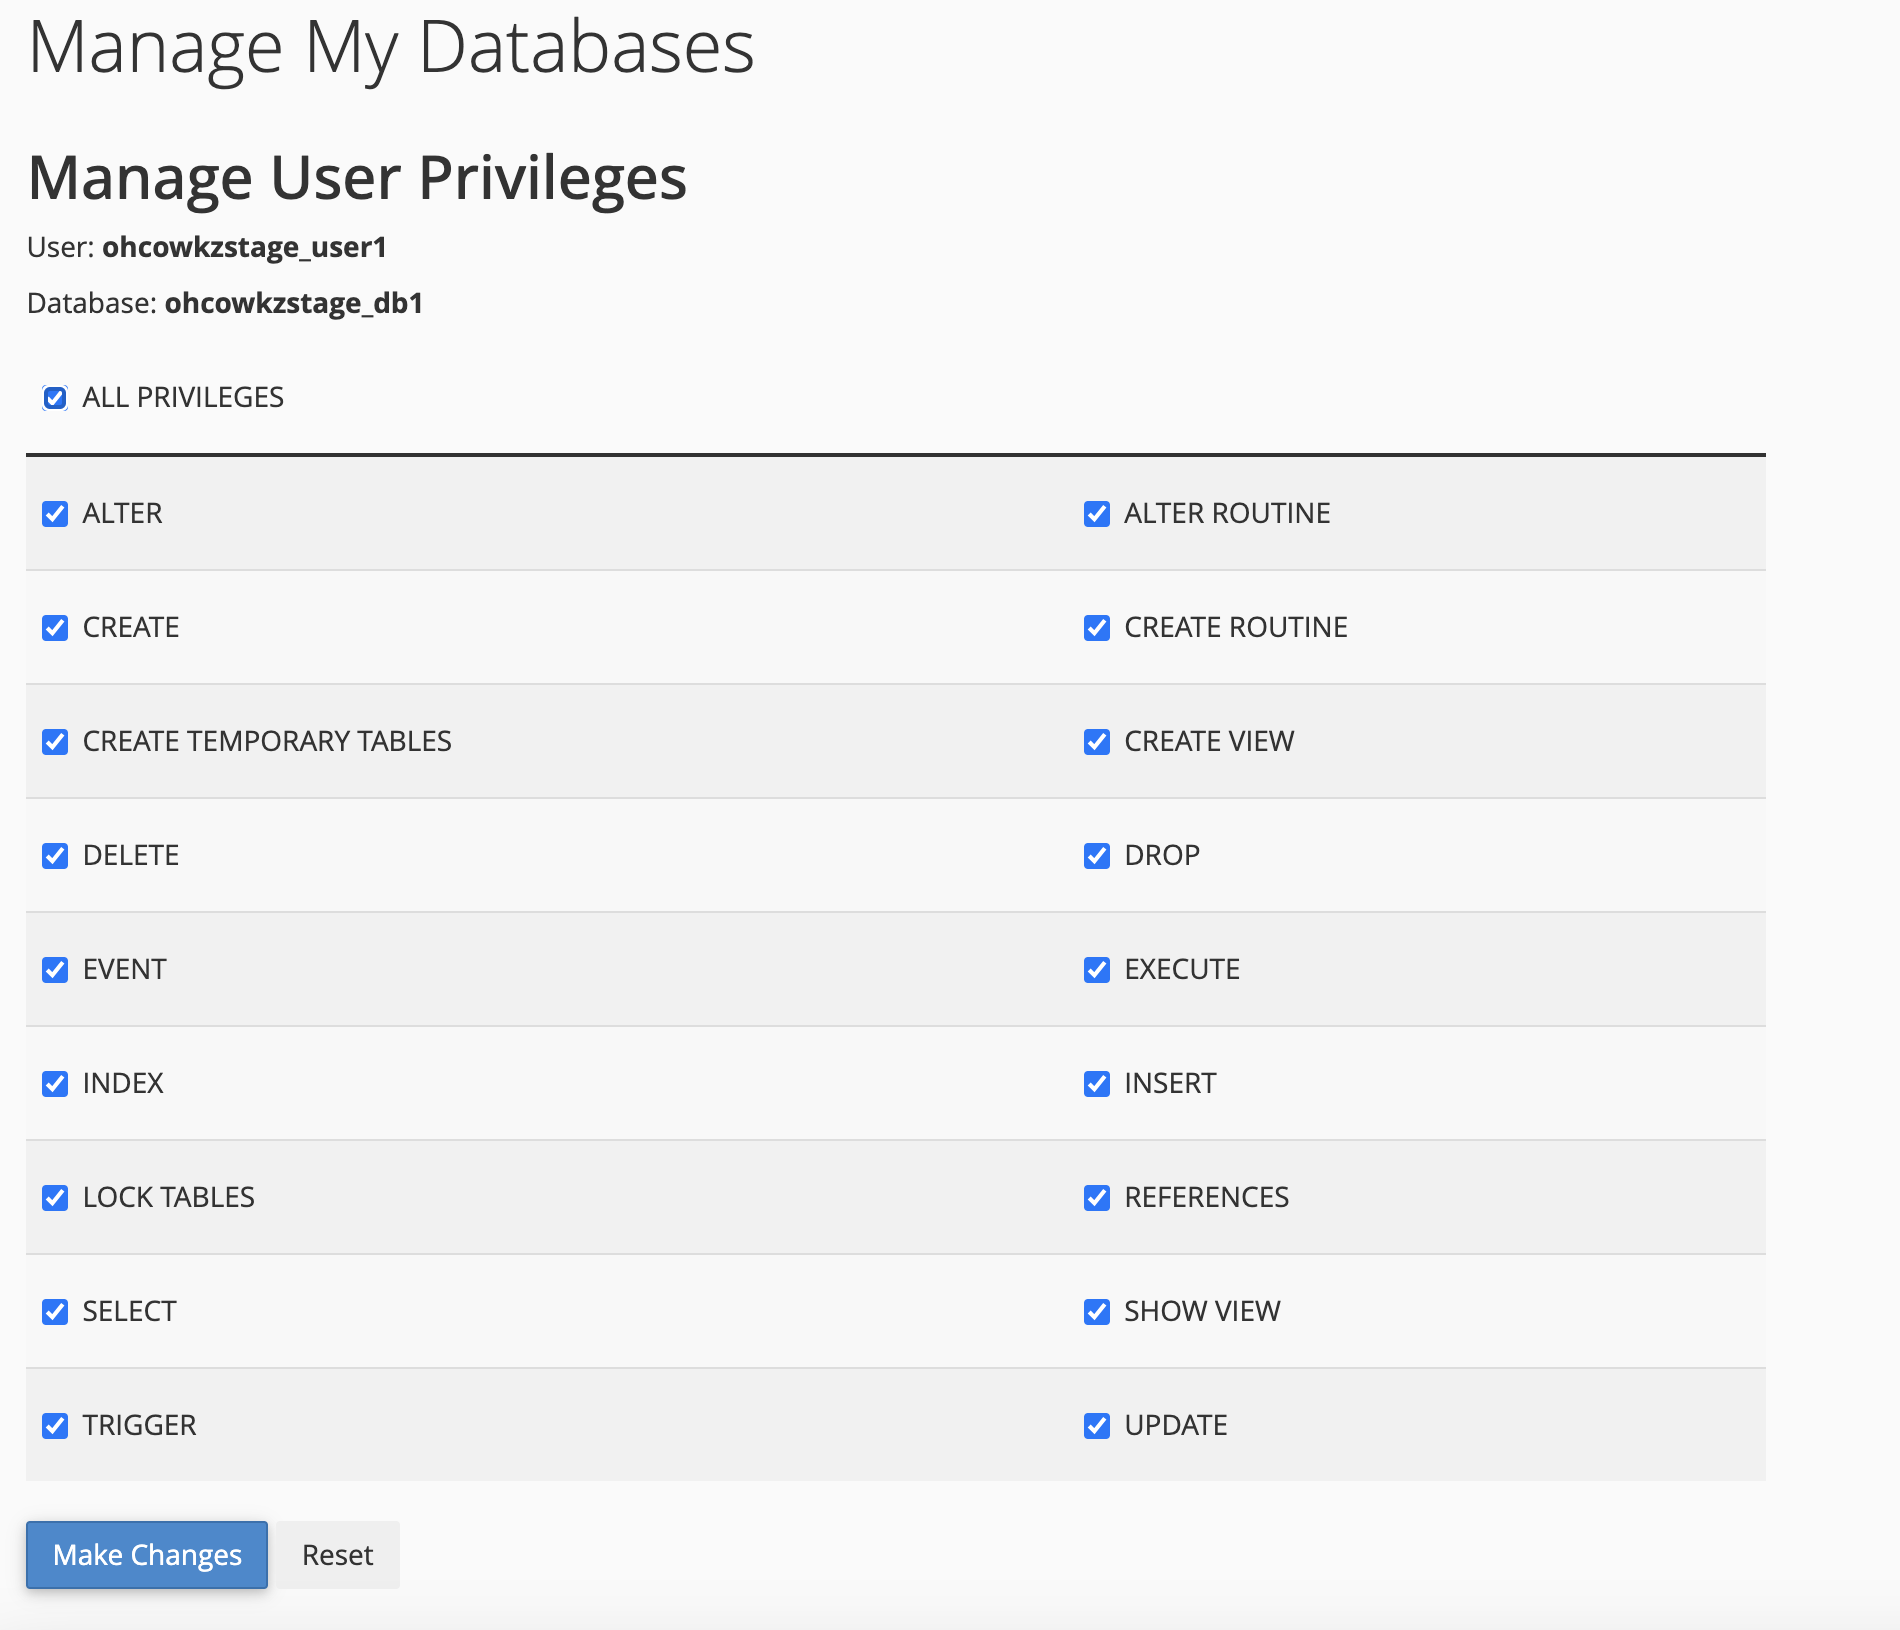
- In the “Manage User Privileges” section, select “All Privileges,” then click “Make Changes” and “Go Back.”
Step 3: Installing and Configuring WordPress
- Access Terminal in cPanel:
- Within cPanel, navigate to “Terminal.”
- If this is your first time accessing the terminal, acknowledge the warning by selecting “I understand.”
- Navigate to the Correct Directory:
- Once in the terminal, you will be at the root of the server. Use the
cdcommand to navigate to thepublic_htmldirectory
- Once in the terminal, you will be at the root of the server. Use the
- Install WordPress:
- Follow the standard procedure for installing WordPress (specific command details to be confirmed).
- After installation, visit the staging site’s URL to begin the WordPress setup process.
- Configure WordPress:
- Select your preferred language (e.g., English [US]).
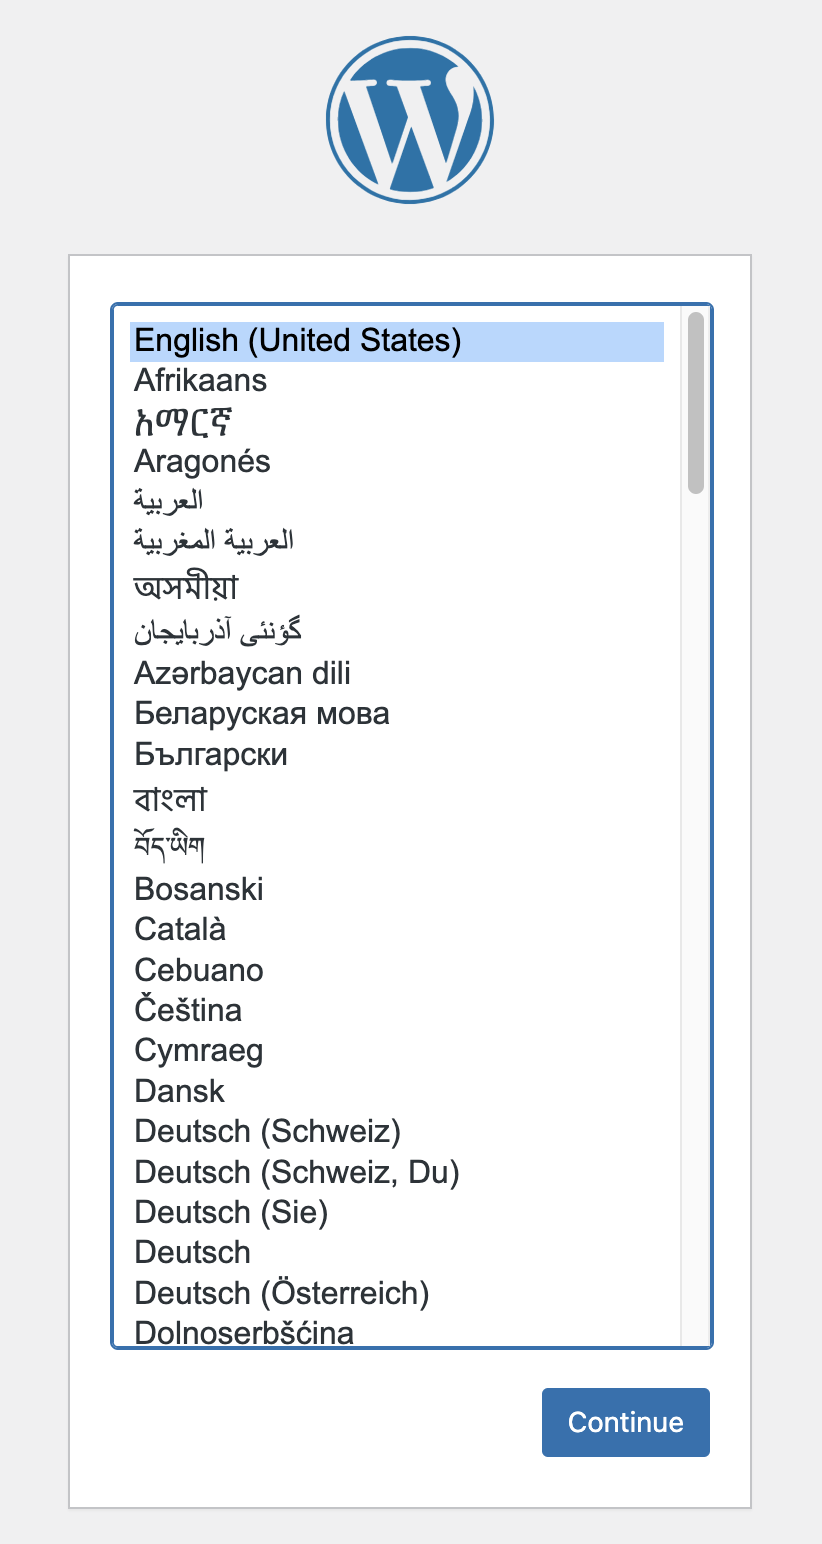
- When prompted, enter the database information stored in 1Password.
- Proceed by clicking “Run the Installation.”
- Enter the required details such as username (e.g., zeitguys) and the appropriate password (use the password from the live WordPress site or generate a new one as needed).
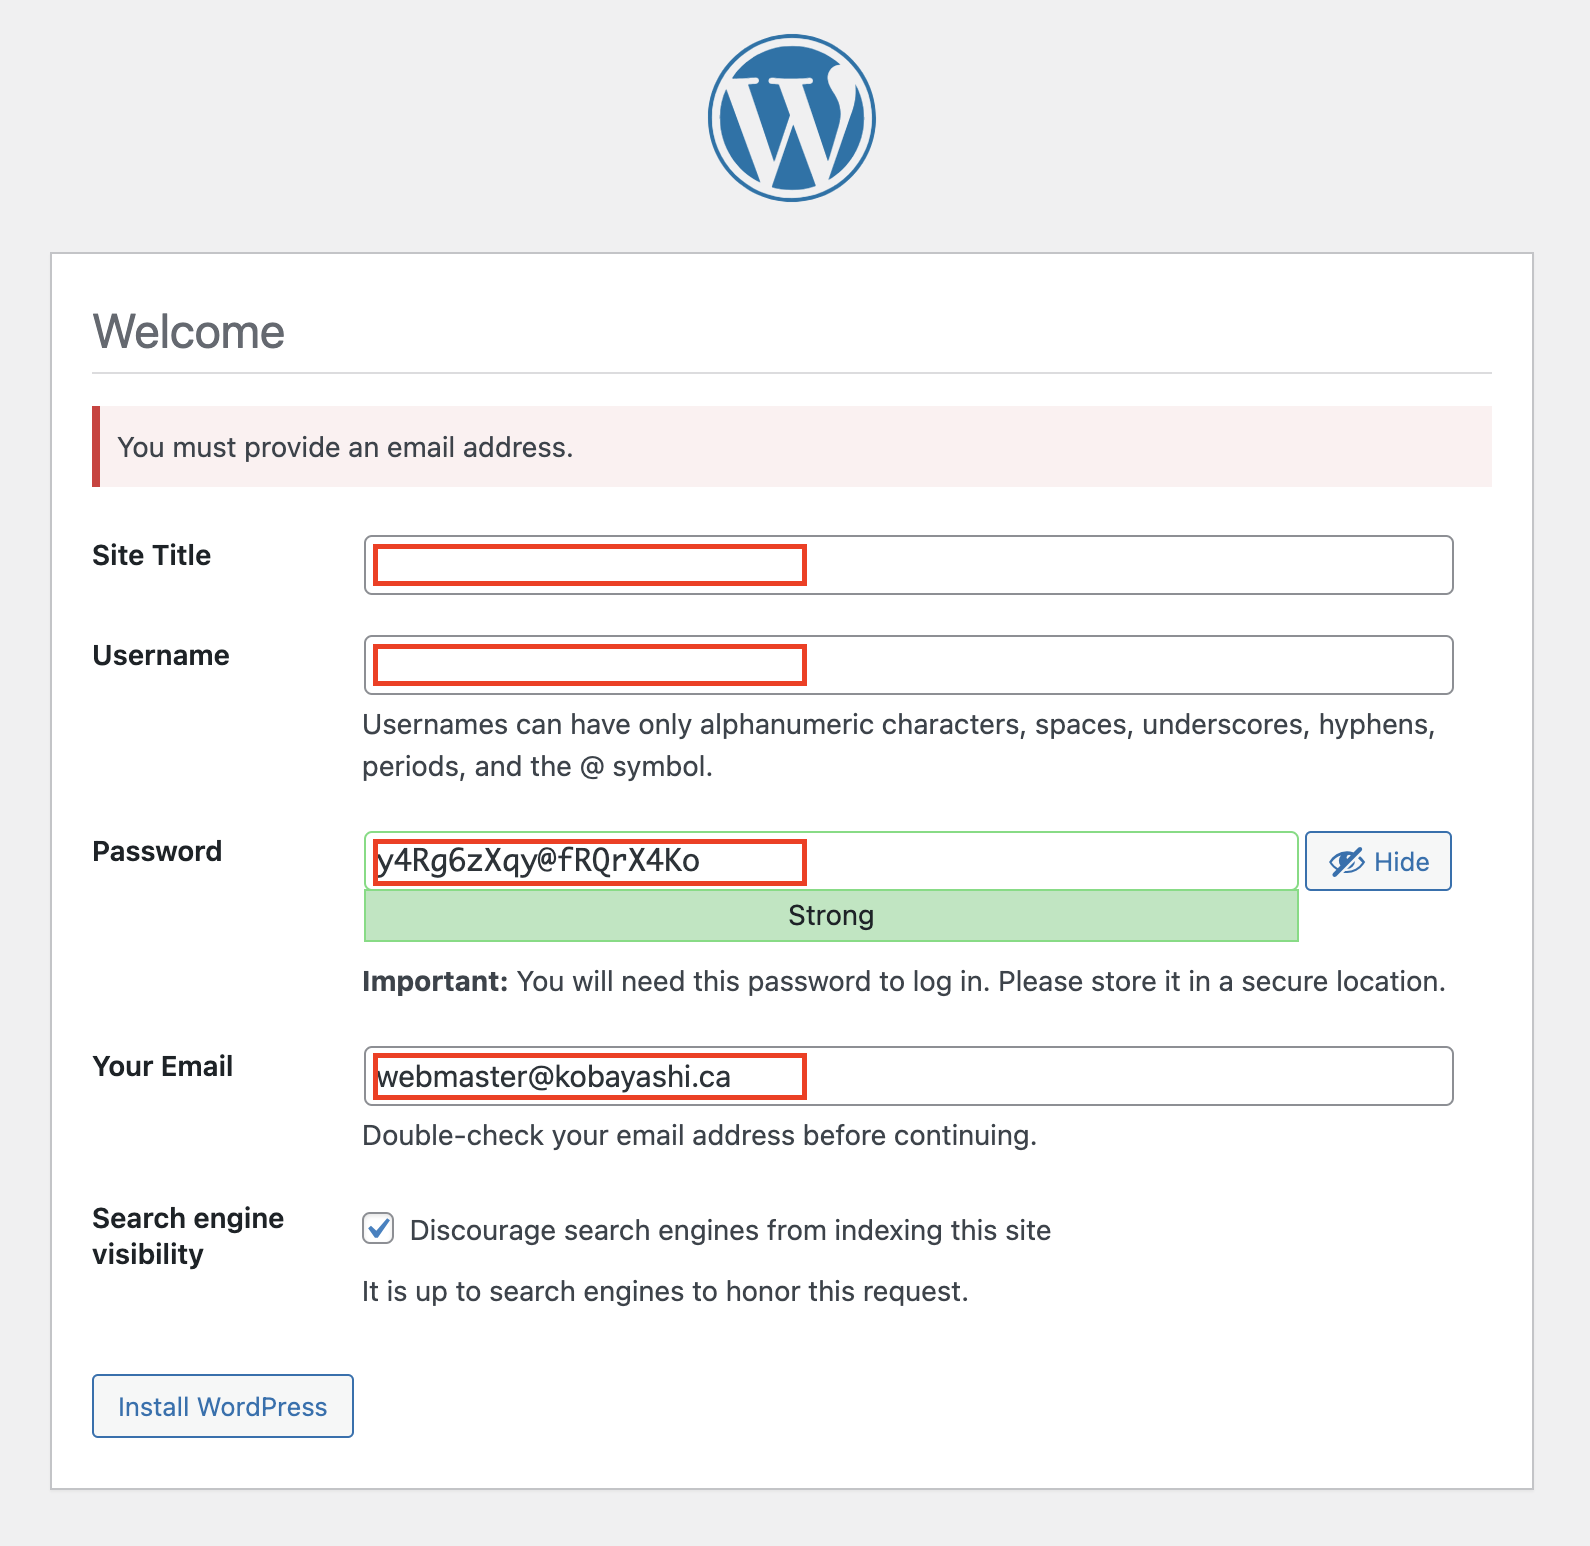
- Complete the installation and log in to your new WordPress staging site.
